Recipes for pasta can seem intimidating if it's not something you make (from scratch) at home very often. The Dirty Apron cookbook is a great and approachable guide to rely on when you're still getting comfortable with pasta making, or any new culinary skill for that matter. With tips and tricks from the cooking classes taught at Vancouver's acclaimed Dirty Apron Cooking School, you couldn't be in better hands.
![Image for [node:title]](/sites/default/files/styles/article_freeheight/public/the_dirty_aprin_cover.jpg?itok=_fZj4BM7)
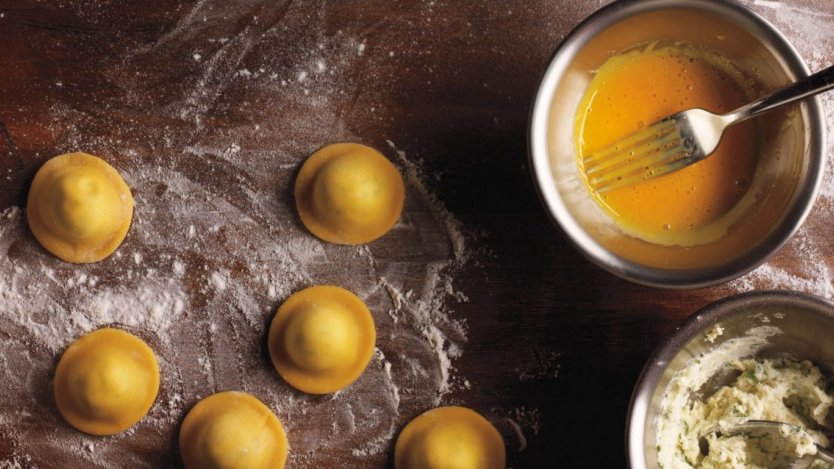
Few things can replace the brightness and texture that goat cheese offers. This well-balanced ravioli dish combines the peppery flavour of arugula with a rich butter sauce that smooths out the tanginess of the goat cheese.
Ravioli filling
Finely chop the arugula and place it in a small bowl. Add the olive oil and the cheeses, combine well, and season with salt and pepper.
Lightly dust a work surface with flour. Cut a sheet of pasta in half and arrange it with the long side parallel to the counter. Fill a small bowl with cold water.
Using a tablespoon, mound a bit of the filling in the centre of the pasta sheet about an inch in from one end. Mound the next bit of filling about 2 inches from the first one. Continue until the sheet is covered with spoonfuls of filling. Remember to leave about an inch between the last bit of filling and the far edge of the pasta. Dip your finger in the cold water and lightly brush the pasta in between the fillings.
Place the other pasta sheet over the mounds of the fillings. Gently press in between the mounds to seal the filling in and press any air out.
Using a ravioli cutter (or a round cutter or a sharp knife), cut the pasta into squares or circles. Repeat with the remaining pasta and filling. (You should have 18 to 20 ravioli.) Set a large pot of water on the stove to boil.
(Note: feel free to use ricotta cheese instead of goat cheese.)
Walnut and sage butter sauce
In a large sauté pan, combine the butter, walnuts and sage over high heat until the butter begins to brown and the milk solids start to foam at the top, about 1 minute.
Remove the pan from the heat as soon as this happens, so that the butter doesn't burn.
Pasta dough
Place the “00” and semolina flours into a large bowl, mix well with a fork and make a well in the centre. Crack the eggs into the well and add the olive oil. Using a fork, beat the eggs and oil until smooth.
Working from the centre outward, use the back of the fork to draw small amounts of the flour into the egg mixture. Keep working in the flour in this way until it is completely incorporated.
When you have worked in all the flour—or when you can no longer use the fork to work in the flour—dust both hands with flour. Scoop your dough and any loose flour into a ball. Then, using two hands, knead dough for about 5 minutes, or until it becomes smooth, silky and elastic.
To determine whether it is ready for shaping and rolling, use the pinch test. Using your thumb and index finger, pinch through the centre of the dough until your fingertips meet. You know the dough is done when no dough sticks to your fingers when you pull them apart. If dough sticks to your fingers, add a pinch of flour and continue kneading.
Once the dough is ready, divide the dough into two parts. Wrap each portion of dough in plastic wrap and set aside while you prepare the pasta machine. Lightly dust a clean work surface and the pasta machine with flour. Adjust the pasta machine so the rollers are at the widest setting (usually “0”).
Unwrap one portion of dough, flatten it slightly and roll it through the pasta machine. Fold the dough over itself and work it through the rollers again. Continue to fold and roll the dough until it feels like suede. Lightly dust the pasta with flour between rollings by setting it on the work surface.
Adjust the pasta machine to the next narrowest setting (usually “1”) and pass the dough through the rollers again. Continue to pass the dough through the rollers, adjusting the machine down another setting after each roll. If the dough becomes too long, cut it in half. Keep rolling the pasta until you reach the last or second-last setting. Transfer the rolled sheet(s) to a baking sheet and cover each layer with waxed paper. Repeat with the remaining dough.
Once all of the dough has been stacked on the baking sheet, wrap the entire tray tightly with plastic wrap and refrigerate. The rolled dough will keep refrigerated for up to 3 days.
- Yield:
- Serves 4
- Cook Time:
- 5 minutes


